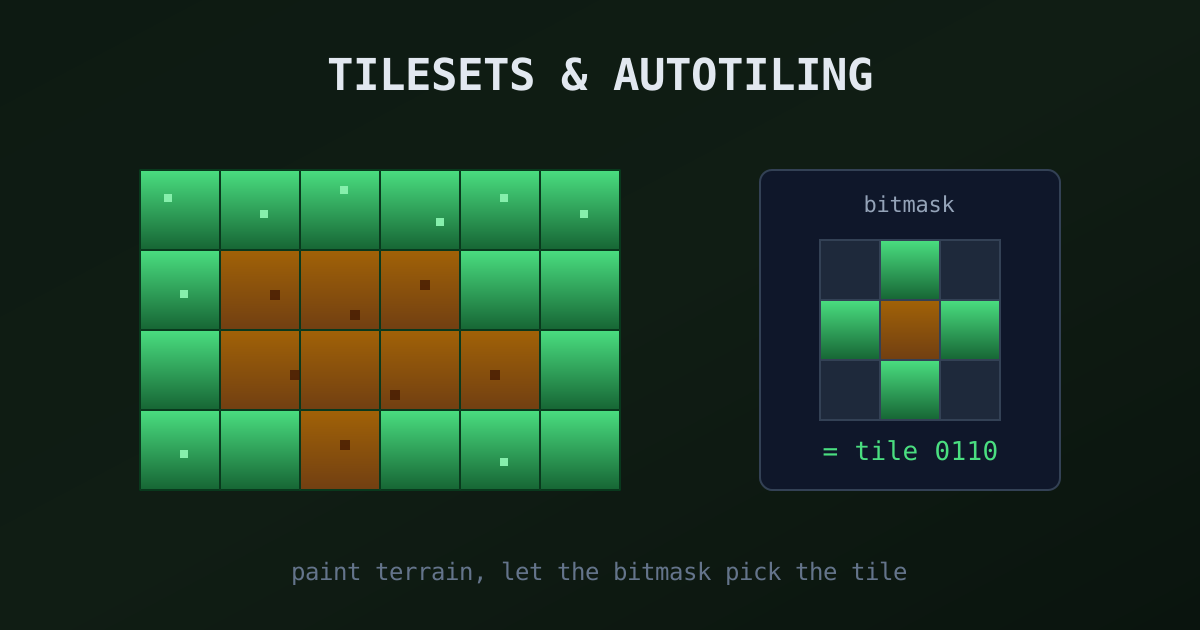
A tileset is a sprite sheet of uniform tiles plus rules for placing them. Autotiling reads each tile's neighbors as a bitmask and picks the right edge or corner variant automatically: 16 tiles cover paths and fences, 47 tiles cover organic terrain. Draw tiles that wrap at the edges, test them in a 3x3 grid, and let the engine's terrain system do the painting.
Characters get all the attention in pixel art, but open any 2D game and count the pixels on screen. Most of them are tiles. Grass, walls, water, cliffs: the world is a grid of small repeating images, and how well that grid hides its own repetition is most of what separates a rich-looking game from a checkerboard.
This guide covers the whole pipeline: what a tileset actually is, how autotiling picks the right tile for you, and how to draw tiles that do not scream "I am a grid."
Tileset, Tilemap, Sprite Sheet: Three Different Things
The words get used interchangeably and they should not be.
| Term | What it is |
|---|---|
| Sprite sheet | Any packed image of frames: characters, effects, UI |
| Tileset | A sprite sheet of uniform, grid-aligned tiles plus placement data |
| Tilemap | The grid of indices saying which tile goes where |
A sprite sheet is about loading and drawing efficiently; a sprite sheet for a character is just frames in a grid. A tileset carries more: collision shapes, terrain rules, placement probability. And the tilemap is pure data, a spreadsheet of tile IDs the engine renders by stamping tileset cells onto the screen. One 256x256 tileset image can draw a world of thousands of screens because the map stores numbers, not pixels.
Tile sizes follow the same families as everything else in pixel art: 8x8 for dense retro geometry, 16x16 as the classic default, 32x32 for chunkier modern styles. Match your tile size to your sprite density; the canvas size guide covers how those fit together.
Autotiling: The Bitmask Trick
Placing tiles by hand means constantly picking the right edge piece: grass-with-dirt-below, grass-with-dirt-below-and-right, inner corner, outer corner. Autotiling automates the picking with one elegant idea: encode the neighbors as a binary number.
Look at any terrain cell and ask of each neighbor, "same terrain as me?" Yes is 1, no is 0. Read the answers in a fixed order and you get a number, the bitmask, and that number indexes directly into your tileset. Paint a blob of dirt and the engine recomputes each cell's mask and swaps in the right variant, live. The classic bitmasking tutorial on tuts+ walks the logic step by step, and Red Blob Games has a great interactive autotiling explainer if you want to feel it click.
The size of your tileset depends on how many neighbors you count:
- 4-bit, 16 tiles. Count only the four edge neighbors: 2^4 = 16 combinations, 16 tiles. Perfect for things that connect edge to edge: paths, fences, pipes, roads. No inner corners, so organic terrain looks wrong.
- 8-bit, 47 tiles (the "blob"). Count all eight neighbors: 2^8 = 256 combinations. But a diagonal only matters when both edges next to it are filled, which collapses 256 cases down to 47 unique tiles. This is the standard set for grass, water, cliffs, anything with inner corners.
That 256-to-47 reduction comes from the Wang tile literature; Boris the Brave's classification of tilesets is the best modern tour of it, and his mirror of the legendary cr31 blob pages preserves the original diagrams.
Forty-seven tiles sounds like a lot to draw. In practice you draw far fewer unique pieces: one full tile, four edges, four outer corners, four inner corners, then assemble the 47 from those parts. Some artists draw the 13 pieces and build the rest by combination in minutes.
Engine Support: You Rarely Code This Yourself
Every serious engine and editor ships autotiling now, under different names:
- Godot 4 calls them terrains. You assign "terrain peering bits" to each tile in the TileSet, choose a match mode (corners and sides, corners only, sides only), and paint with the terrain brush. The official TileSet docs cover the setup, including the texture padding option you will want in a moment.
- Unity uses Rule Tiles from the 2D Tilemap Extras package. Each rule is a visual 3x3 grid of "this / not this / don't care" conditions, with support for rotated and mirrored matching and even random or animated outputs. The Rule Tile manual has the details.
- Tiled, the free standalone map editor, unified everything under terrain sets in version 1.5: corner sets for terrain, edge sets for roads, mixed sets for full blob behavior, with per-tile probability weighting. The terrain documentation is excellent, and Tiled exports to basically every engine.
The pattern across all three: you spend your time authoring the tileset once, tagging which parts of each tile are which terrain, and then level design becomes painting with a broad brush while the bitmask logic picks tiles.
Watch for texture bleeding. Tiles sit edge to edge in the atlas, so with bilinear filtering or a non-pixel-snapped camera, the renderer samples a sliver of the neighboring tile and you get flickering seam lines around every tile in the level. The fixes are the same as for any sprite sheet: nearest-neighbor filtering, a pixel-snapped camera, and a 1-2px gutter around tiles (Godot's "use texture padding" does this automatically). The packing and padding guide explains exactly why this happens.
Drawing Tiles That Do Not Look Like Tiles
The technical setup is the easy half. The hard half is drawing a tile that repeats forever without the eye catching the repeat.
Make the edges wrap. The right edge of a tile must flow into its own left edge, and the bottom into the top, in color, pattern, and detail density. Not identical pixels, continuous ones. Any dedicated pixel editor helps here; Aseprite's Tiled Mode previews the repetition live while you draw.
Test in a 3x3 grid, then offset it. One tile alone always looks fine. Nine copies expose seam lines. Then mentally shift the grid by half a tile: hidden seams and accidental diagonal stripes show up in the offset view.
Keep loud details away from edges and centers. The eye is a pattern-matching machine. One distinctive dark cluster in a grass tile becomes a polka-dot field at map scale. Keep contrast low and detail scattered, and push distinctive elements into separate decoration tiles you place sparingly.
Make variants. Two to four variations of your base tile, scattered randomly (Tiled and Unity both support probability weights), kill repetition more cheaply than any amount of careful single-tile polish.
Keep the palette tight. Terrain sits behind everything, so it should be lower contrast and lower saturation than characters. If your hero disappears against the grass, the grass is too loud. The game UI readability guide applies the same figure-ground logic to interface elements.
A Practical First Tileset
If you have never built one, this is the order that works:
- Pick your grid: 16x16 unless you have a reason not to.
- Draw one perfect, seamless base tile per terrain (grass, dirt). Test in 3x3.
- Draw the transition pieces between your two terrains: edges, outer corners, inner corners.
- Assemble a 16-tile edge set first. Get it autotiling in your engine. Feel how the workflow clicks.
- Upgrade to the 47-tile blob only for terrains that need inner corners.
- Add two or three variant tiles per terrain and a handful of decoration tiles.
When you assemble the pieces into an atlas, keep the grid strict and the spacing consistent, since every engine expects uniform cells with fixed margins. The sprite sheet creator handles the packing, padding, and grid math, and if you are dissecting someone else's tileset to learn from it, the sprite sheet splitter cuts it back into individual tiles. Plenty of real tilesets to study sit in the community gallery.
Build your tileset into a clean atlas.
Pack your tiles into a uniform, engine-ready tileset with exact grid sizes and padding, right in your browser.
The Short Version
Tilesets are sprite sheets with placement rules; tilemaps are the data that arranges them. Autotiling reads each cell's neighbors as a bitmask: 16 tiles for edge-matching things like paths, 47 for organic terrain with inner corners, and Godot, Unity, and Tiled all automate the picking once you tag your tiles. Draw tiles that wrap, test in an offset 3x3 grid, add variants, and keep the palette quiet. Then pack the atlas cleanly, pad it against bleeding, and go paint a world.