Sprite Sheet Splitter
Cut an existing sprite sheet back into individual frames. Slice on a grid, or let auto-detection find the sprites for you.
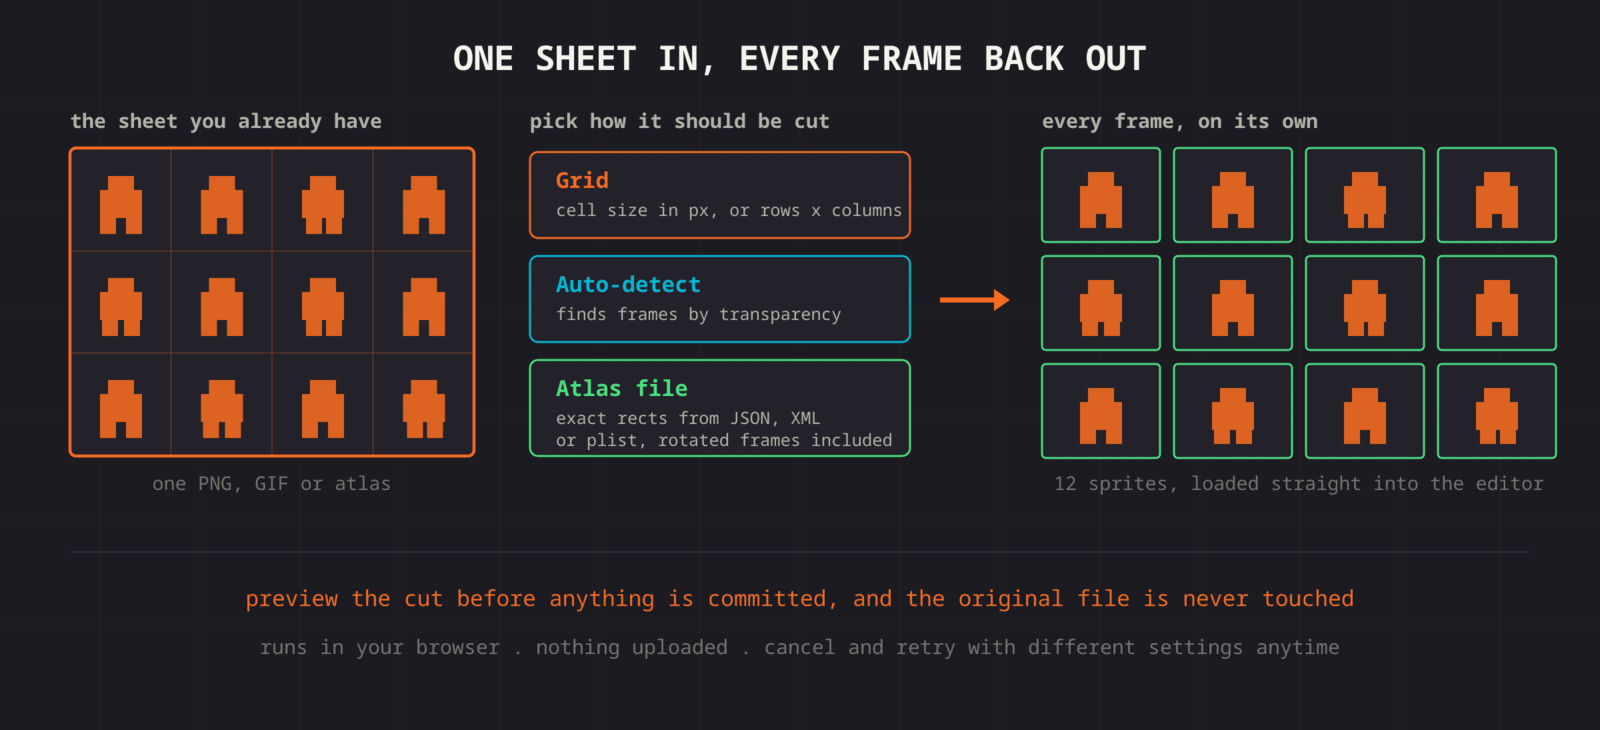
Extract sprites from any sheet
Load a sheet and the sprite sheet splitter shows you where it wants to cut before it cuts. Grid mode takes a cell size, or a row and column count. Auto-detect scans for islands of non-transparent pixels and boxes each one, which is the mode for sheets that were never on a grid to begin with. Whatever comes out lands in the editor, where you can reorder it, fix it, or pack it into something new.
Grid-based splitting
Give it a cell size in pixels, or a row and column count. The right mode for uniform sprite sheets, which is most of them.
Auto-detection
Automatically finds sprite boundaries in irregular or packed sheets by analyzing pixel data and transparency.
Atlas file slicing
Attach the atlas that came with the sheet and the exact frame rects get used. Reads TexturePacker JSON, Sparrow XML, and Cocos2d plist, rotated frames included.
GIF frame extraction
Upload an animated GIF and extract every frame as an individual sprite, ready to rearrange or re-export.
Live preview
Cut lines move as you change the numbers. If the preview looks wrong the settings are wrong, and nothing has happened yet.
Straight to editor
Extracted sprites load directly into the editor. Reorder, edit, add layers, and re-export as a new sheet.
Non-destructive
The original image is never modified. Cancel anytime and start fresh with different settings.
Why you end up needing to unpack a sheet
Packing is the easy direction. Unpacking is the one that comes up when you inherit somebody elses work. An asset pack arrives as a single PNG with no data file. A game rip has all the frames but the wrong arrangement for your engine. A collaborator left the project and the only surviving version of the character is the exported atlas. A sheet built for a 16 pixel grid needs to become a 32 pixel one.
In each case the pixels are all there and the arrangement is the problem. Getting the frames back out as separate sprites turns a fixed asset back into an editable one, and from there it can be reordered, trimmed, recolored, or repacked to whatever your project expects.
Three ways to find the frame boundaries
Three ways to find the boundaries
- Grid mode is for sheets laid out on a uniform cell, which is most of them. Give it the cell size in pixels, or a row and column count if the cell size is not round, and the cut lines appear on top of the image. If the lines slice through the middle of a sprite, the numbers are wrong and nothing has been cut yet.
- Auto detection is for sheets that were never on a grid. It scans for islands of non transparent pixels and boxes each one, which handles hand arranged sheets and output from packers that were tuned for density rather than tidiness. It needs real transparency between sprites to work, so a sheet with a solid background is a grid mode job.
- Atlas mode is the exact one. If the sheet came with its data file, attach it and the frame rectangles get read rather than guessed. TexturePacker JSON, Sparrow XML, and Cocos2d plist all describe frames precisely, including sprites the packer rotated to save space, and each frame comes back at its original size and orientation.
Trimmed and rotated frames, and what they do to alignment
Modern packers do two things that make a sheet smaller and unpacking harder. Trimming crops the transparent margin off every frame, so each rectangle is only as big as the pixels in it. Rotating turns a tall frame on its side to fit a gap. Both are recorded in the data file, along with the original untrimmed size and where the trimmed piece sat inside it.
Split with the data file and that information is honoured, so the frames come out aligned the way the artist drew them. Split by grid or auto detection without it, and you get the pixels but not the original registration: every frame is tight to its own content, which is exactly the pivot problem that makes an animation wobble. Align the frames inside a common cell afterwards and the wobble goes away.
What to do with the frames once they are out
The extracted sprites land in the editor rather than in your downloads folder, which means the next step is whatever you actually wanted. Repack them at a different cell size for a different engine. Delete the eight frames of an animation you are not using and keep the sheet small. Split one packed sheet into several smaller ones by moving frames onto separate layers.
From there the usual routes are open: fix a stray pixel in the pixel editor, run a palette swap to make a second colour variant, preview the animation to confirm the frame order survived the trip, or export the loose frames as a ZIP if another tool needs them as files. The original image is never modified, so a split that went wrong costs nothing except doing it again with better numbers.
Tilesets need a different approach than characters
Character sheets and tilesets look similar and split differently. A tileset is by definition on a strict uniform grid, usually 8, 16, or 32 pixels, and tiles butt directly against each other with no transparent gap. That makes grid mode the only sensible choice: auto detection has nothing to separate, since a grass tile touching a dirt tile is one continuous island of pixels.
The number to get right is the tile size, and the way to find it is to look at where the pattern repeats rather than to divide the image dimensions. A 320 by 320 image is twenty 16 pixel tiles or ten 32 pixel ones, and only the artwork tells you which.
Mind the gap
Watch for tilesets with a one pixel border or gap between tiles, which some tools add to prevent bleeding. Split those as if the gap were not there and every tile picks up a stripe of its neighbour. Account for the spacing first, and the tiles come out clean.
More questions? See the full FAQ.