Drop an image into the editor, tell the importer how big one frame is, and you have a sprite sheet. Everything after that is refinement: arrange the grid, check the animation at the right FPS, fix stray pixels, recolor, then export in the format your engine reads. Nothing installs, nothing uploads, and the whole loop takes about five minutes.
This is the tour. If you have never used the tool, follow it top to bottom with the editor open in another tab and you will finish with a sheet your engine can load. Every screenshot below is the real interface, not a mockup.
What You Need
Anything image-shaped works: a folder of individual PNG frames, one existing sprite sheet, or an animated GIF. There is no account, no upload, and no file size limit imposed by a server, because the whole pipeline runs in your browser on your machine.
Individual frames or one big image? Both are fine. Drop a folder of PNGs and each file becomes a frame. Drop a single image and the importer offers to slice it for you. The rest of the workflow is identical.
Step 1: Import and Slice
Drag your image anywhere onto the editor, or hit Add image. A single image always opens the importer, because a single image is ambiguous: it might be one sprite, or it might be twenty-four sprites in a trench coat.
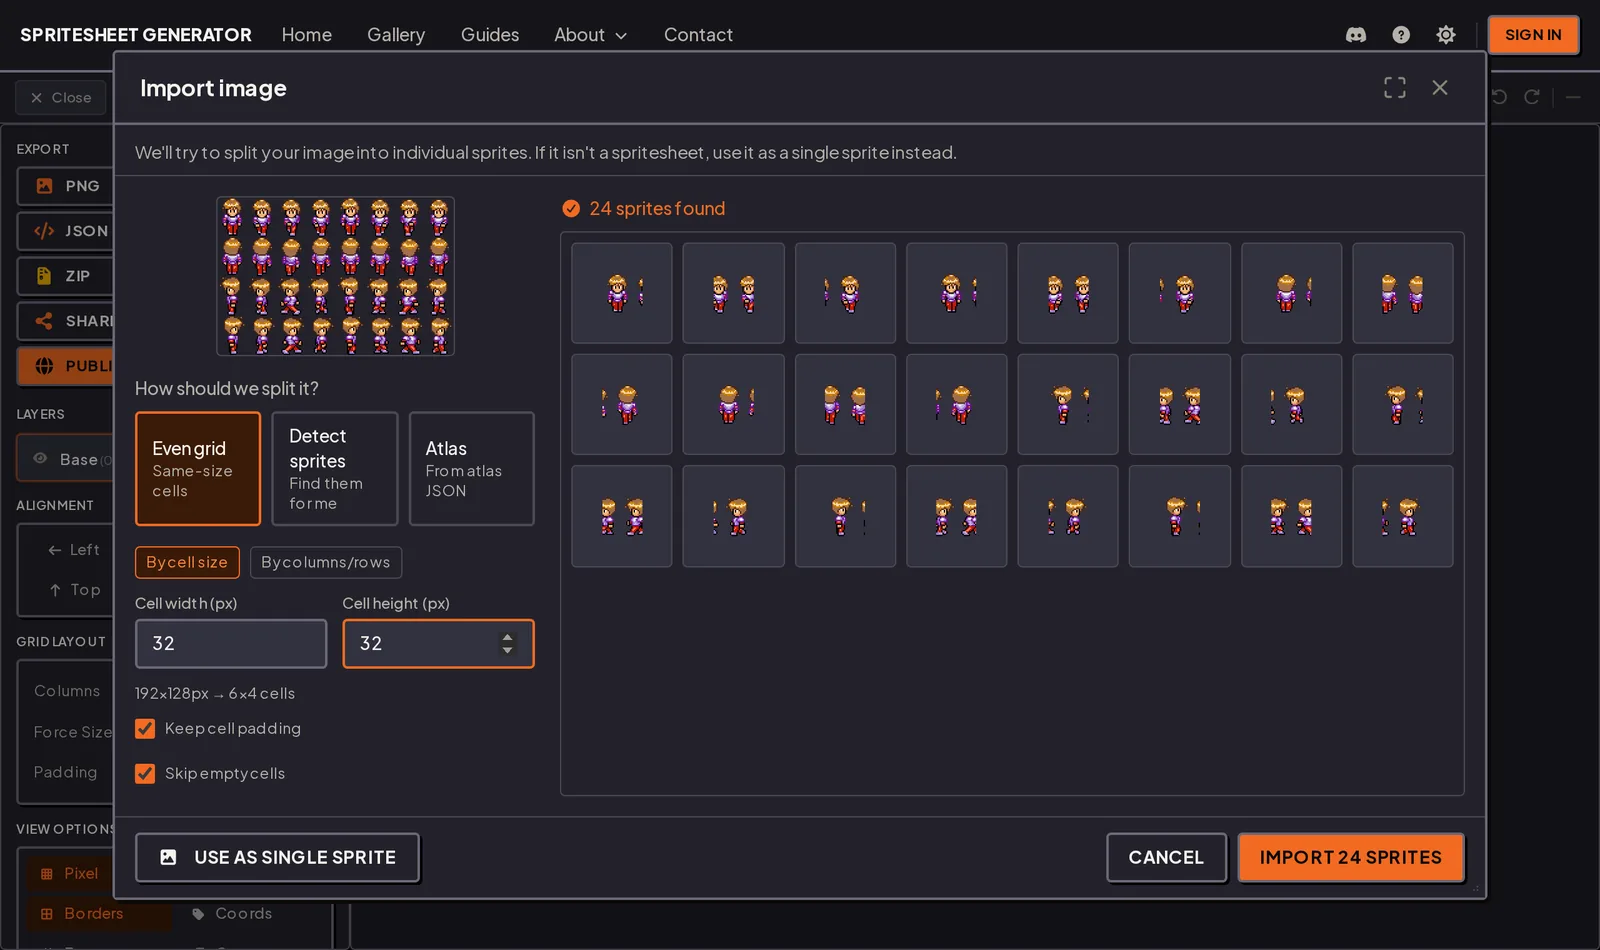
You get three ways to cut it:
- Even grid is the right answer for almost every sprite sheet. Type the cell size (say
32x32) and the preview updates live. The line under the inputs confirms the math:192x128px -> 6x4 cells. If that number does not match what you expected, your cell size is wrong. - Detect sprites scans for islands of non-transparent pixels and boxes each one. Use it when frames are irregularly spaced or you inherited a sheet with no consistent grid. Raise the sensitivity if it merges two sprites, lower it if it splits one.
- Atlas reads the metadata file that came with the sheet and uses its frame rectangles verbatim. TexturePacker and Phaser JSON, Sparrow XML, and Cocos2d
.plistall work, rotated frames included. This is the exact-fidelity option when you already have the metadata.
Skip empty cells drops fully transparent cells so a 6x4 grid with two blanks imports as 22 frames, not 24. Keep cell padding preserves each sprite's position inside its cell, which matters when your frames are deliberately off-center.
Not a sprite sheet at all? Hit Use as single sprite in the bottom left. The importer never traps you.
Step 2: Arrange the Grid
Confirm the import and the frames land on a grid you control.
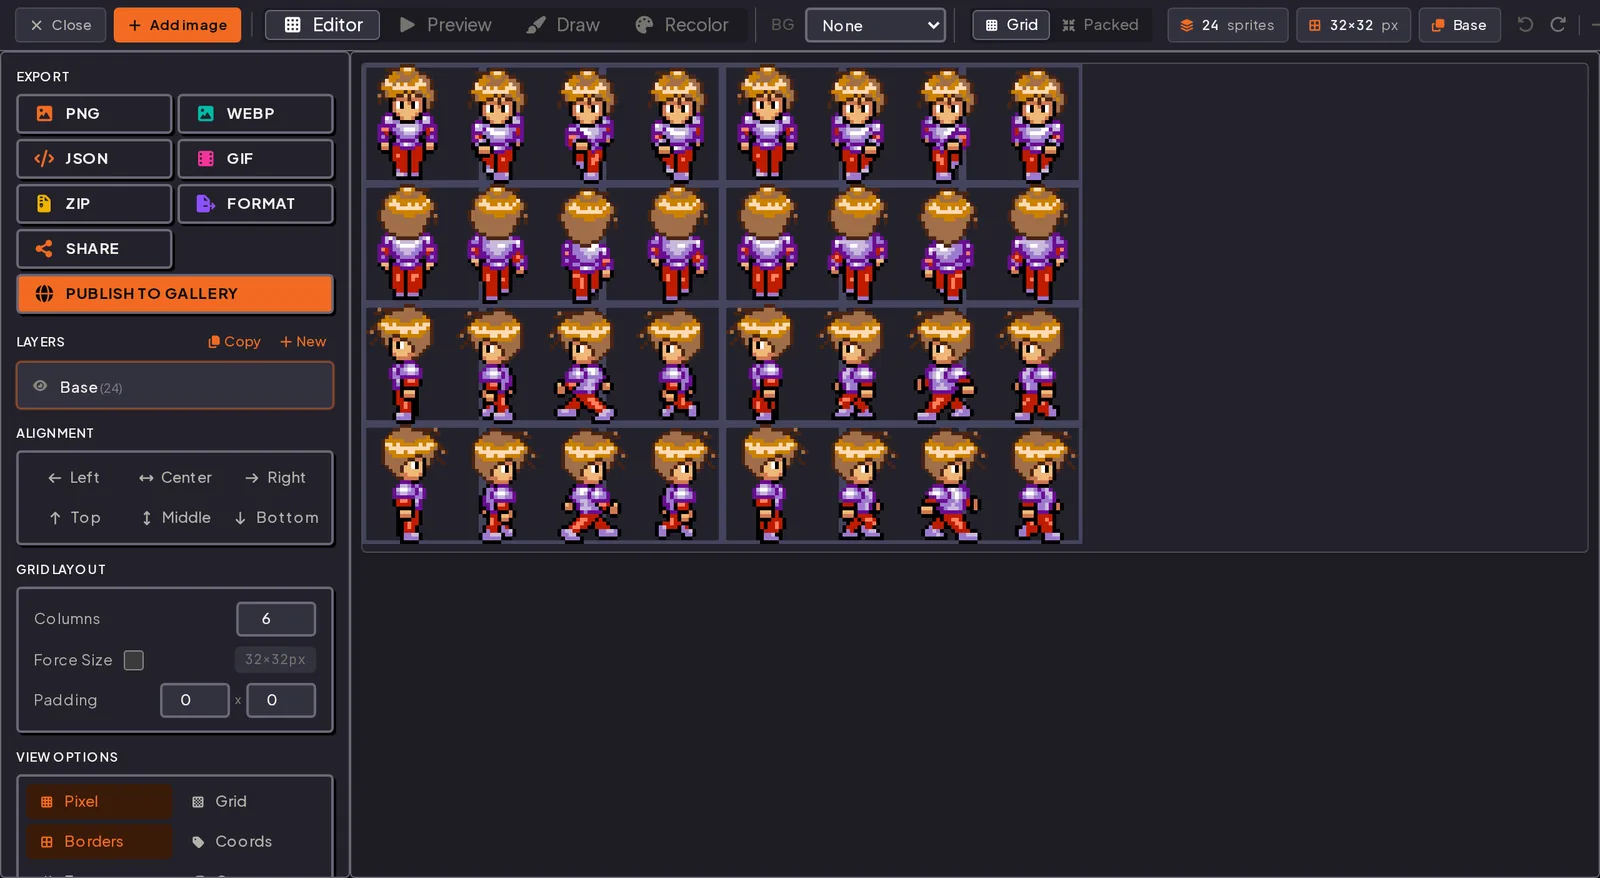
The controls that matter, in the order you will reach for them:
| Control | What it does | When you need it |
|---|---|---|
| Columns | Frames per row | Match your engine's expectations, or just keep the sheet squarish |
| Force Size | Locks every cell to fixed dimensions | When frames vary in size and your engine wants a uniform grid |
| Padding | Transparent gutter around every cell | Fixing texture bleeding. See packing and padding |
| Trim Transparent | Crops empty borders off each frame | Shrinking a sheet before packing |
| Alignment | Snaps sprites to an edge inside their cells | Keeping a character's feet on a consistent baseline |
Drag any frame to move it. Turn on Multi to select several at once, Swap to exchange two cells, and Frames in View Options to number every cell so reordering stops being guesswork.
The Grid / Packed toggle in the top bar switches between a uniform grid and a MaxRects-packed atlas that squeezes out dead space. Grid is easier to read and easier for engines to slice; packed is smaller. Choose per project.
Step 3: Check the Animation
Frames sitting still tell you nothing. Open the Preview tab.
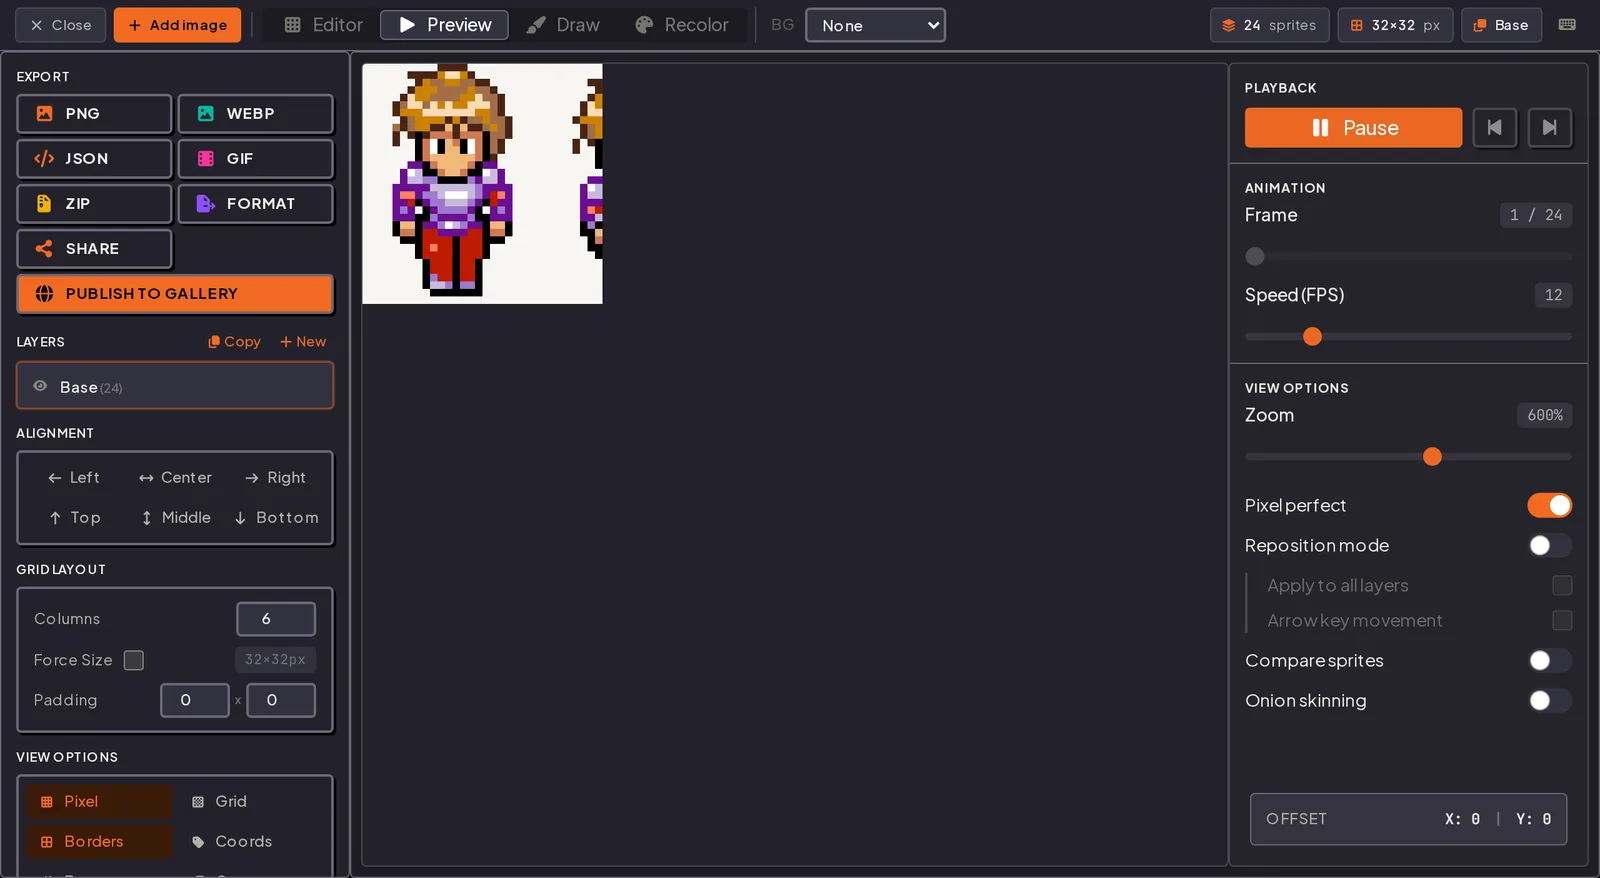
Play it, then set Speed (FPS) to whatever your engine will actually use. Twelve is a sane default, and the number matters more than most people expect: the fps table in the basics guide shows how 8, 12, and 24 actually read. Turn on Onion skinning to ghost the neighboring frames and catch a limb that jumps a pixel between poses.
The preview plays every visible frame in grid order. If the walk cycle looks scrambled, the frames are out of order on the canvas, not broken. Go back to the Editor tab, turn on frame numbers, and drag them into sequence.
Step 4: Fix Pixels in Place
Found a stray pixel? You do not need another program. Open the Draw tab and click the frame.
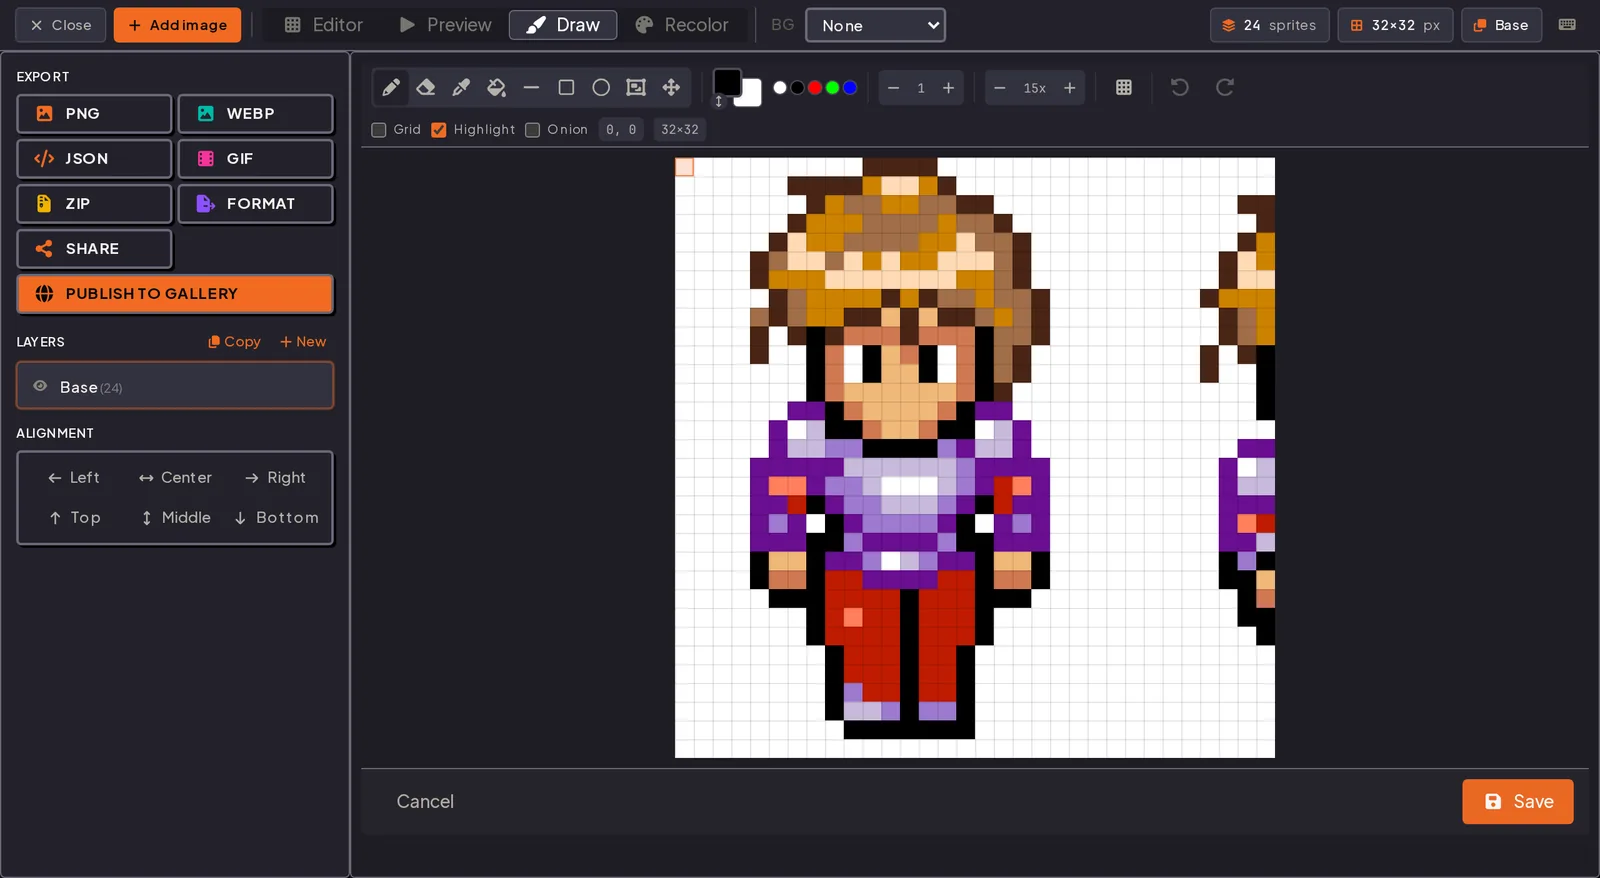
Pencil, eraser, eyedropper, bucket fill, line, rectangle, ellipse, and a move tool, plus undo and redo. Highlight outlines the sprite bounds, Onion ghosts adjacent frames so you can align a fix against the motion, and Save writes the frame straight back into the sheet. No round trip through the file system.
Step 5: Recolor the Whole Layer
The Recolor tab applies non-destructive color shifts across every frame at once.
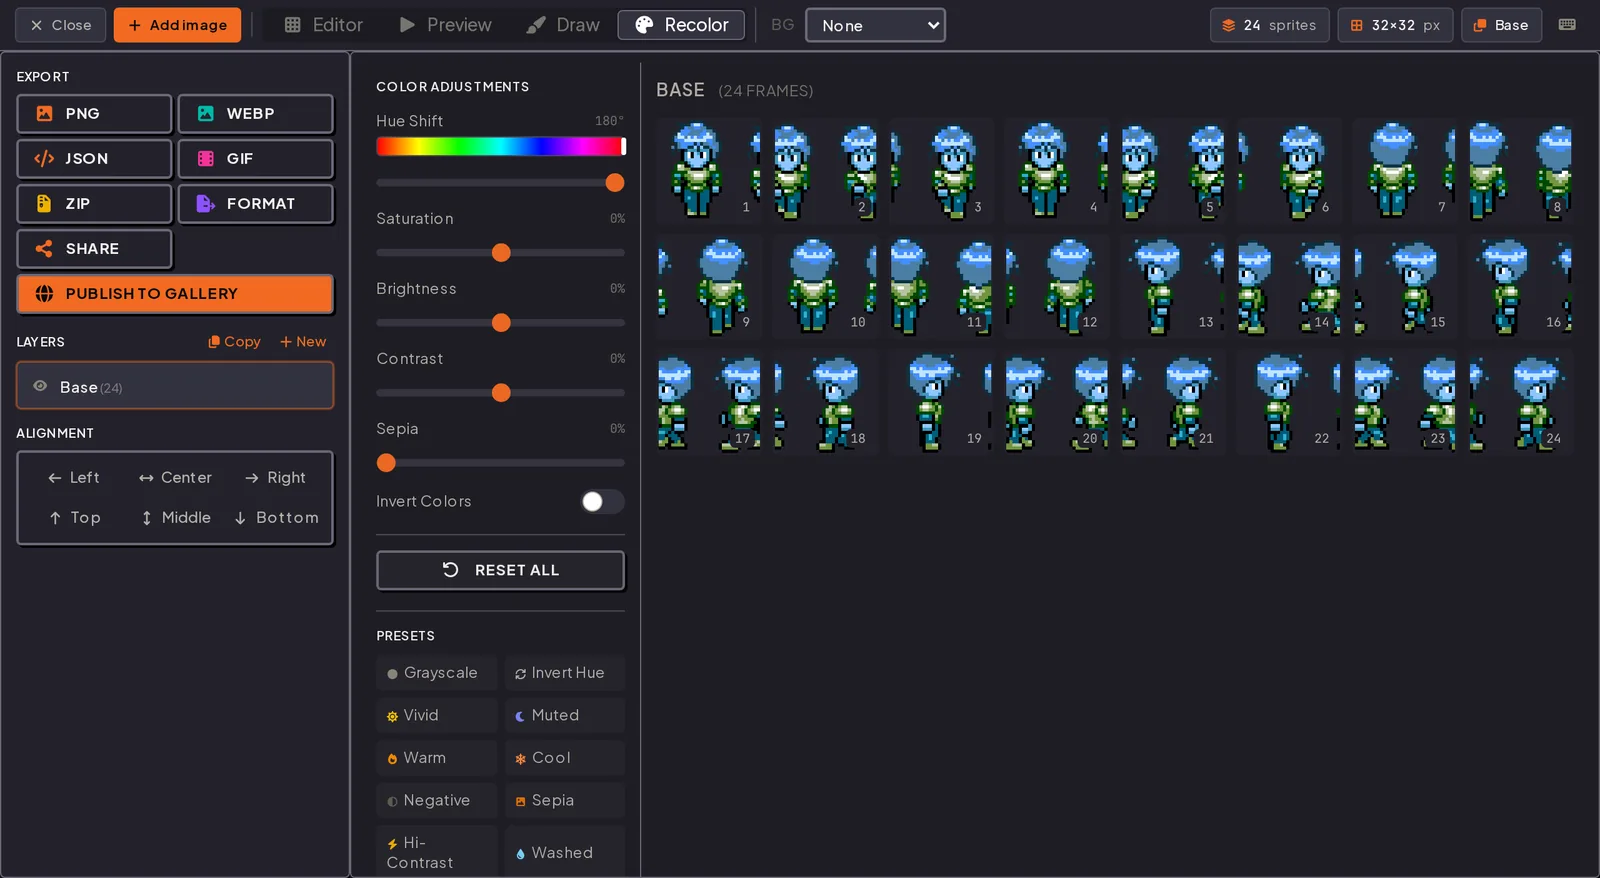
Hue, saturation, brightness, contrast, sepia, and invert, with presets for the common moves. This is how you get four enemy color variants out of one set of frames, a technique old enough to have shipped on the NES. The recolor tool page covers the per-color palette mapping mode as well.
Step 6: Export for Your Engine
Sidebar, top left. PNG and WebP write the raw sheet, JSON the frame metadata, and ZIP every frame as its own file. GIF renders the animation at a chosen FPS, which is handy for a devlog post or an itch.io page.
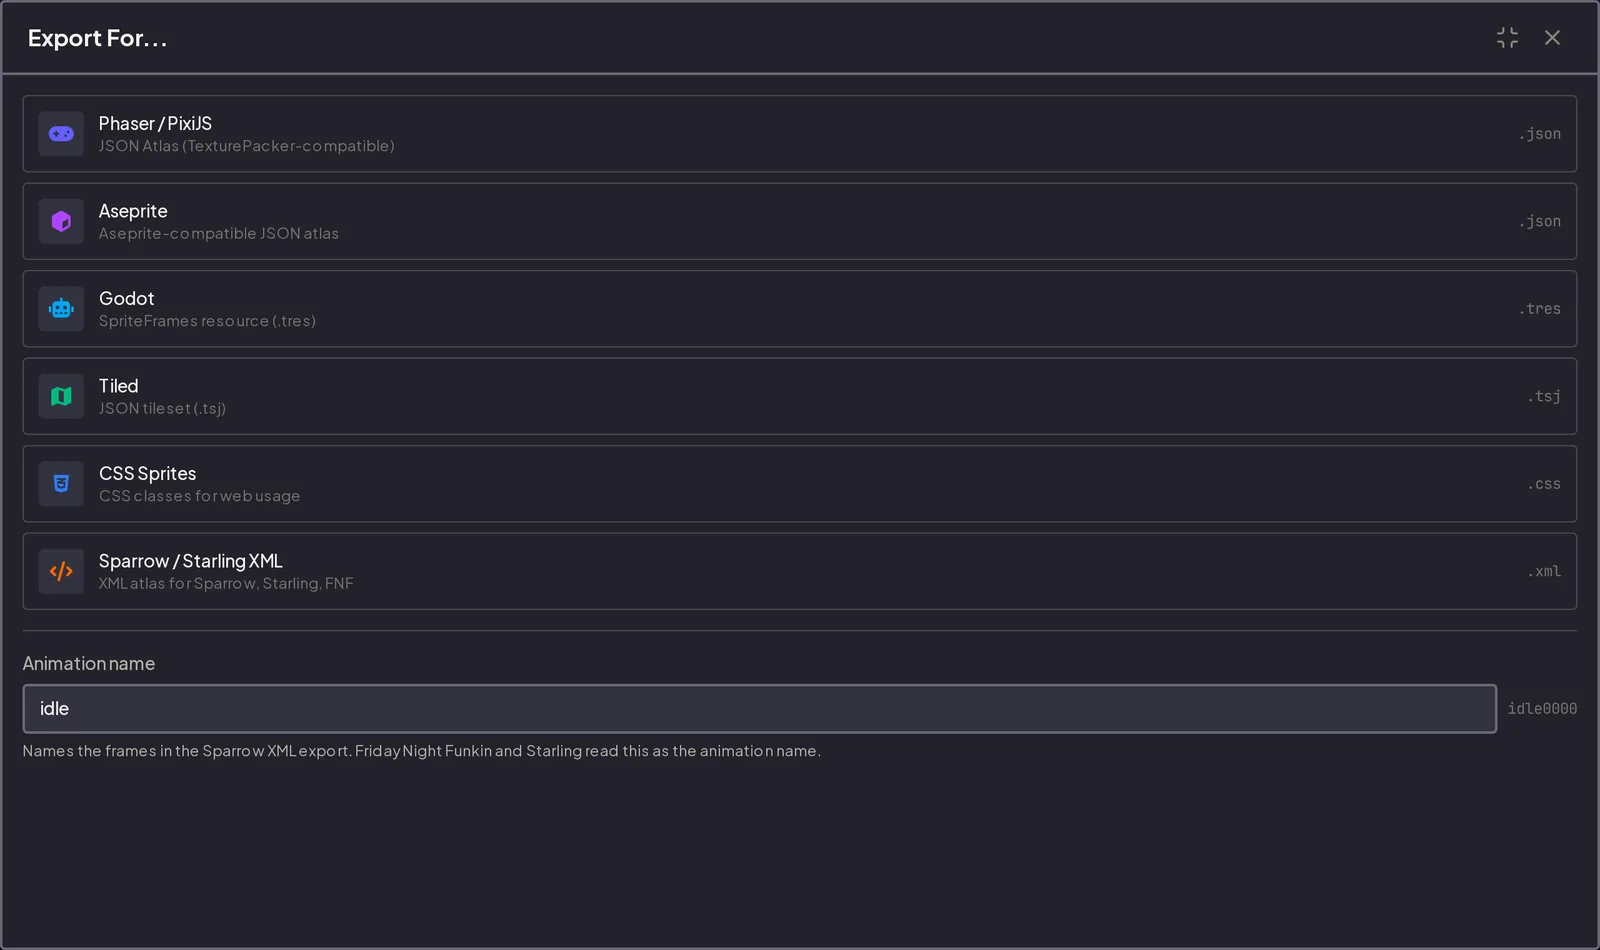
Format is the one to reach for when you are shipping into an engine:
- Phaser / PixiJS - JSON atlas, TexturePacker-compatible
- Aseprite - Aseprite-compatible JSON atlas
- Godot - a
SpriteFramesresource (.tres) you can drop on anAnimatedSprite2D - Tiled - JSON tileset (
.tsj) - CSS Sprites - ready-made classes for web use
- XML - Sparrow / Starling
TextureAtlas, which is also what Friday Night Funkin reads. Set the animation name in the dialog and frames export asidle0000,idle0001and so on
Unity does not need a metadata file: export the PNG and slice it in the Sprite Editor. The engine import guide walks through all four engines with the exact settings, including the filtering setting that stops your pixel art going blurry.
Exporting for pixel art? Use PNG, not JPG. JPG compression invents colors at every hard edge, which is precisely what pixel art is made of.
Where to Go Next
- What a sprite sheet actually is if the vocabulary is new
- Packing, padding, and texture bleeding if you see thin seams around sprites in-game
- Pixel-perfect scaling if your art looks sharp here and blurry in your game
- Importing into Godot, Unity, Phaser, and Construct once the sheet is exported and you need it in an engine
Five minutes, no account, nothing to install. Open the editor
Try it in the editor
Everything in this guide runs in the browser. No install, no account, and your images never leave your device.